SAML: Integrate with Okta
KACE Cloud subscribers can use Okta when setting up single sign-on (SSO).
- Open both KACE Cloud and your Okta portal.
- In KACE Cloud, complete the following steps:
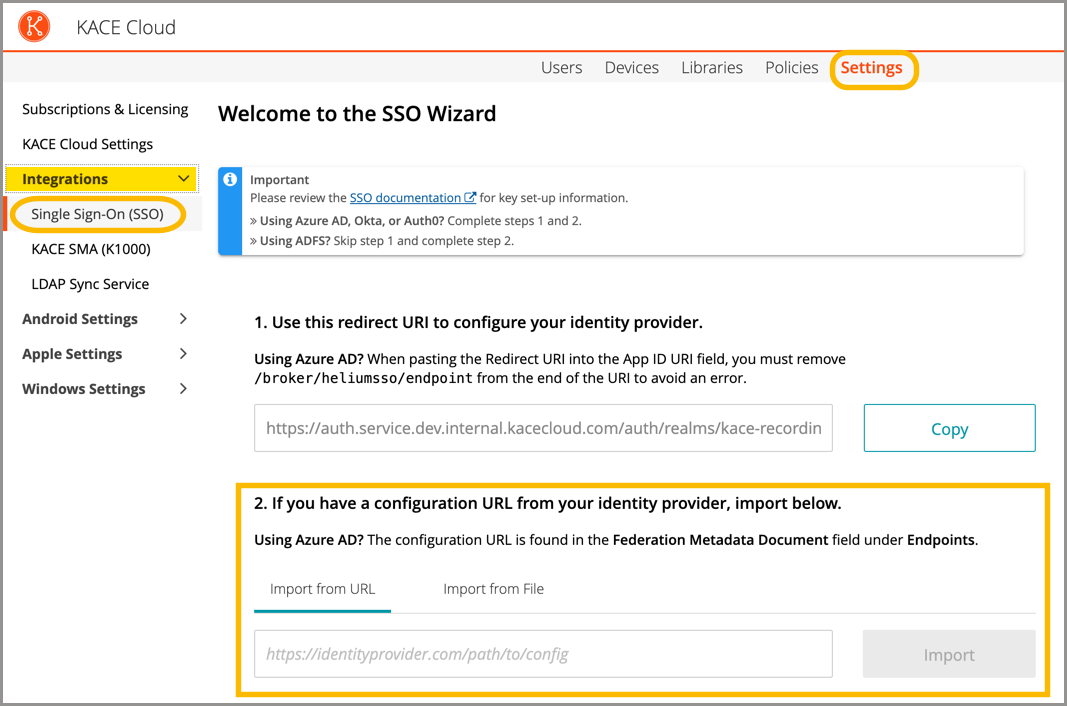
- Select the Settings tab in top navigation.
- In left navigation, under Integrations, choose Single Sign-On (SSO) .
- Select SAML v2.0.

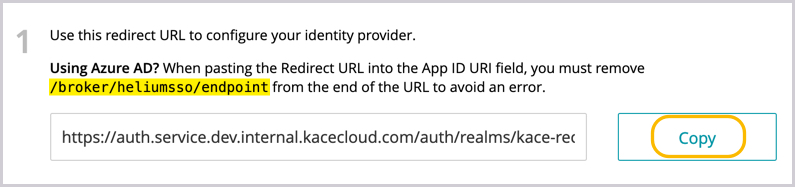
- In KACE Cloud, in the SSO Wizard, copy the redirect URL to configure the identity provider. Save this information for later use.
- In the Okta portal, complete the following steps to set up Okta as your SAML Identity Provider.
- Create a bookmark application to the KACE Cloud Admin portal.
- Select Applications > Application in top navigation.
- Click Add Application.
- Click Create New App.
- In the list of categories, select Okta Test Applications, then Bookmark App.
- On the following page, click Add.
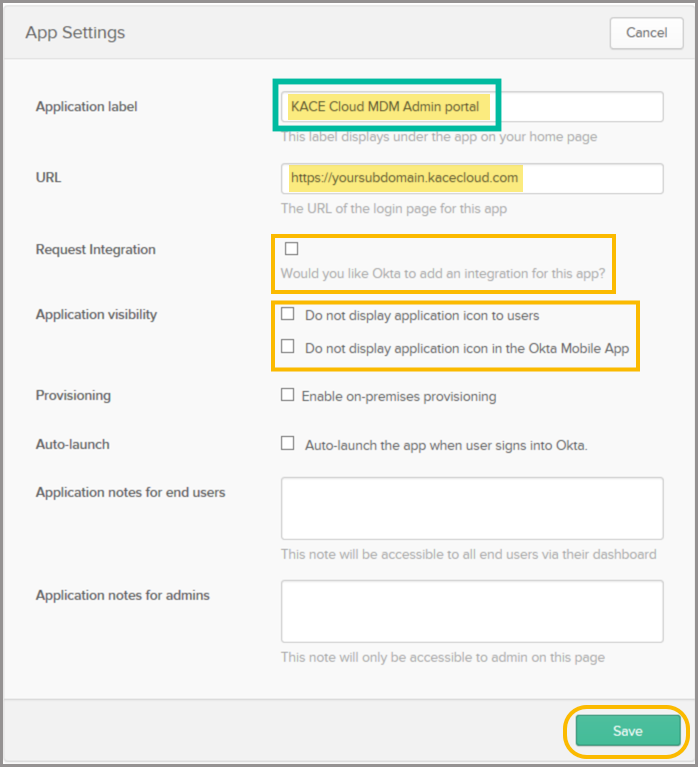
- In the App Settings section, provide the following information:
Application Label KACE Cloud Admin portal URL https://[yoursubdomain].kacecloud.com, where yoursubdomain is your KACE Cloud sub-domain Request Integration Ensure this check box is cleared. Application Visibility Ensure both check boxes are cleared. - Click Save to finish configuring this bookmark app.
- Assign users and groups to the newly created Okta bookmark application.
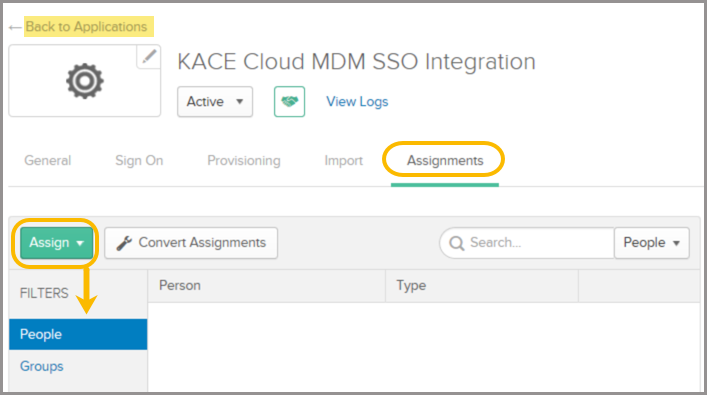
- In the Applications menu, click Assignments.
- Click the Assign dropdown to assign Okta users and groups.
- Click Save.
- Create a new bookmark application to the KACE Cloud Device Enrollment portal.
- Select Applications > Application in the top menu bar.
- Click Add Application.
- Click Create New App.
- In the list of categories, select Okta Test Applications, then click Bookmark App.
- On the following page, click Add.
- In the General Settings section, provide the following information:
Application Label KACE Cloud Admin portal URL https://[yoursubdomain].enroll.kacecloud.com, where yoursubdomain is your KACE Cloud sub-domain. Request Integration Ensure this check box is cleared. Application Visibility Ensure both check boxes are cleared. - Click Save.
- Assign users and groups to the newly created Okta bookmark application.
- In the Applications menu, click Assignments.
- Click the Assign dropdown to assign Okta users and groups.
- Click Save.
- Create a new KACE Cloud SSO integration app.
- Select Applications > Application in the top menu bar.
- Click Add Application.
- Click Create New App.
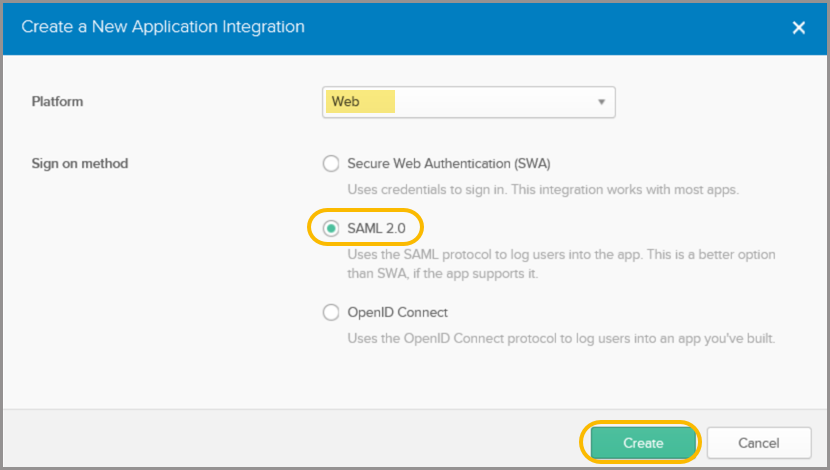
- In the Create SAML Integration Wizard, from the Platform list, select Web.
- Select SAML 2.0.
- Click Create.
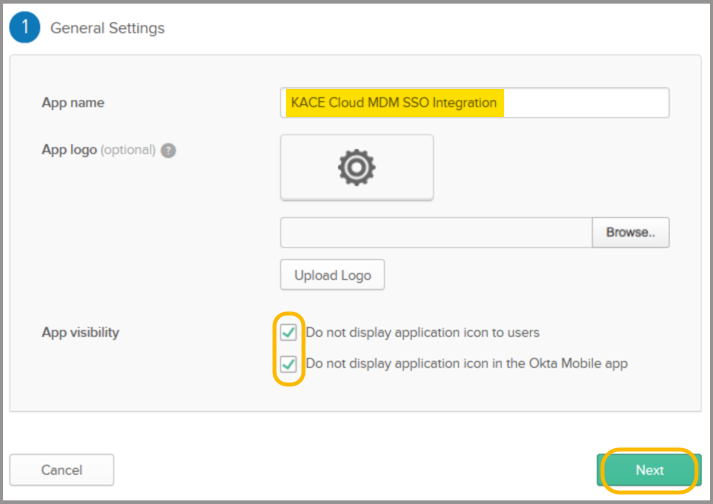
- In the General Settings section, provide the following information:
App Name KACE Cloud SSO Integration App Visibility Select both options. - Click Next.
- In the General Settings section, provide the following information:
Single Sign-On URL Paste the redirect URI copied from the KACE Cloud SSO Wizard in step 3. Requestable SSO URLs Leave blank. Audience URI (SP Entity ID) Paste the redirect URI copied from the KACE Cloud SSO Wizard in step 3, then delete /broker/heliumsso/endpoint from the end of the URI.
Default RelayState Leave blank. Name ID format EmailAddress Application username Okta username (default value) Update application username on Create and update (default value) .png)
- In the Attribute Statements section, add the following attribute entries:
Name Name Format Value http://schemas.xmlsoap.org/ws/2005/05/identity/claims/givenname URI Reference user.firstName http://schemas.xmlsoap.org/ws/2005/05/identity/claims/surname URI Reference user.lastName http://schemas.xmlsoap.org/ws/2005/05/identity/claims/emailaddress URI Reference user.email 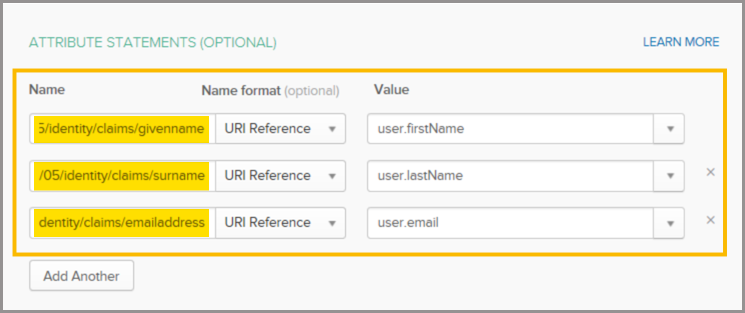
- Optional. Auto-assign users to KACE Cloud roles based on Okta group membership.
- By default, all Okta users assigned to this Okta application are assigned the KACE Cloud device user role. Add this entry to the Group Attribute Statements section only if you want to assign the device user role to users of a single Okta group.
Name Name Format Filter Value http://schemas.microsoft.com/ws/2008/06/identity/claims/group URI Reference Contains {Okta user group name} - By default, assigning the KACE Cloud device admin role to a user is done manually. Add this entry to the Group Attribute Statements section only if you want to automatically assign the device admin role to users of a single Okta group.
Name Name Format Filter Value http://schemas.microsoft.com/ws/2008/06/identity/claims/groups URI Reference Contains {Okta user group name}
Next, complete the following steps in the Feedback section:
- Select I'm an Okta customer adding an internal app.
- Leave all other values as Default.
- Click Finish.
- By default, all Okta users assigned to this Okta application are assigned the KACE Cloud device user role. Add this entry to the Group Attribute Statements section only if you want to assign the device user role to users of a single Okta group.
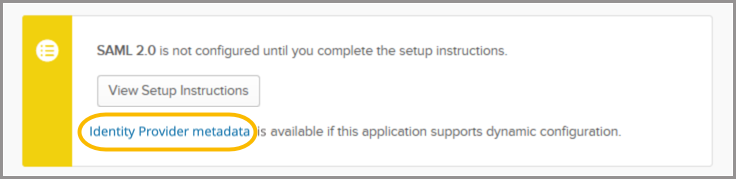
- Right-click and copy the Identity Provider metadata link.
This is used to import the Okta SAML settings into KACE Cloud in step 4e.
- Create a bookmark application to the KACE Cloud Admin portal.
- In the Okta portal, complete the following steps to set up Okta as your SAML Identity Provider.
- In KACE Cloud, complete the single sign-on settings in the SSO Wizard.
- Click the Import from URL tab.
- Paste the identity provider metadata link into the field.
- Click Import.
When imported, the majority of settings are populated on the main KACE Cloud SSO configuration screen.
- Set the NameID Policy Format - Value field to urn:oasis:names:tc:SAML:1.1:nameid-format:emailAddress.

- Update the SAML settings.
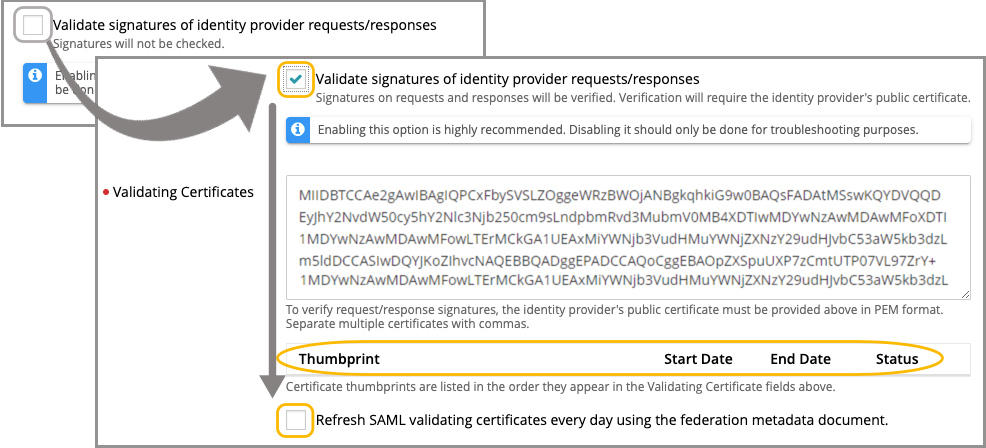
- Ensure the Validate signatures of identity provider requests/responses check box is selected, then review the contents ot Validating Certificates field.
It is highly recommended to leave the Validate signatures of identity provider requests/responses check box selected to ensure optimal security. Disable this check box only for troubleshooting purposes.
If the certificate value is obtained after importing the Identity Provider metadata in step 3g, it appears in the Validating Certificates field. Otherwise, you must manually copy and paste the appropriate value.
- Click Save Settings at the bottom of page.
- Ensure the Validate signatures of identity provider requests/responses check box is selected, then review the contents ot Validating Certificates field.
- Review and configure user attribute mappings, as needed.
At this point, user attribute mappings are pre-populated in KACE Cloud. The mappings pre-populate consistently for Azure AD, Okta, and AuthO. Some providers may use different names for common attributes. When using a different identity provider, you must confirm the naming conventions for common attributes and add them manually.
.png)
- Optional. Assign user roles.
By default, all Okta users assigned to the KACE Cloud SSO Integration application are assigned the Device User role in KACE Cloud. Also, by default, the KACE Cloud Device Admin role must be manually assigned to users.
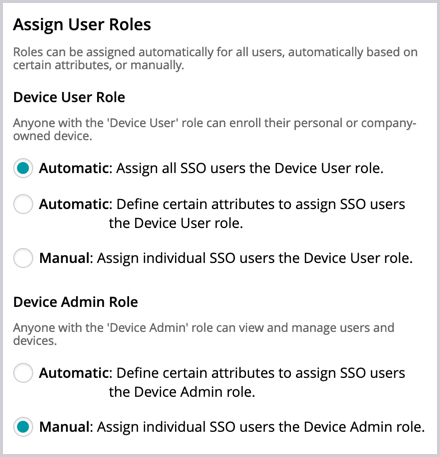
To automatically assign a user role to a user based on that user's Okta group membership, select the Automatic: Define certain attributes to assign option for that role (for the Device User Role and/or Device Admin Role) and specify the following values:
- Click Save Settings at the bottom of page.
- In KACE Cloud, enable and test single sign-on.
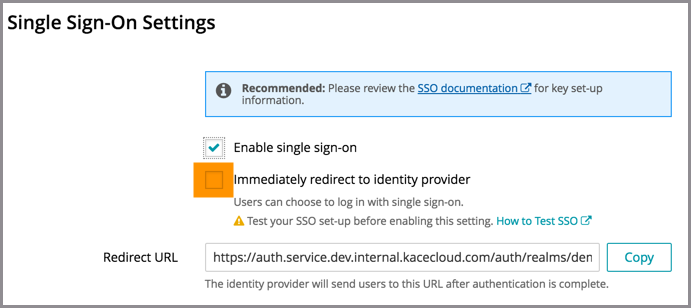
- On the Single Sign-On Settings page, at the very top, select the Enable single sign-on (SSO) check box.
- Before selecting the Immediately redirect to identity provider check box, test the success of the single sign-on setup.
- Open a new incognito window or private browser to ensure the login data is clear.
- Go to the KACE Cloud portal, but do not log in.
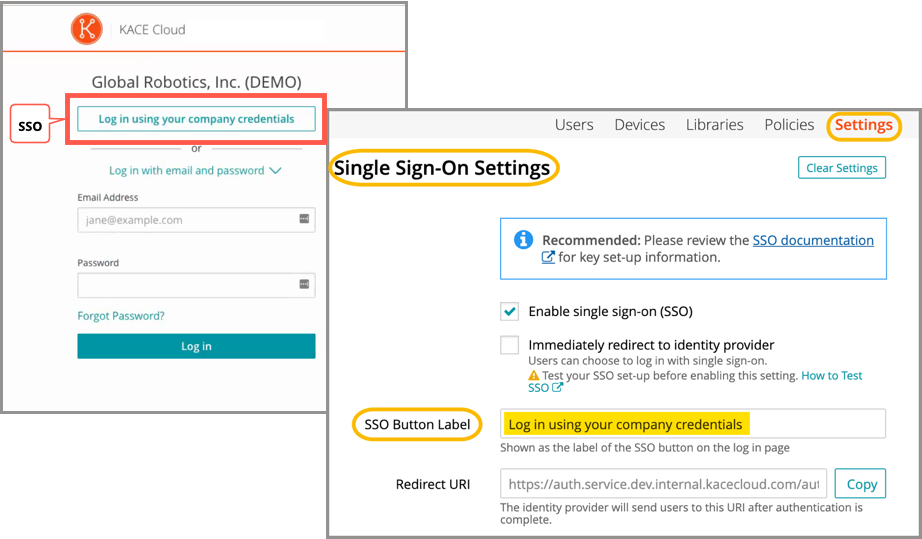
- Follow the Single Sign-On workflow using the customizable button.
In the example below, the Log in using your company credential button leads to the SSO workflow. The label on this button can be customized using the SSO Button Label field at the top of the SSO Wizard.
- On an Okta login page that appears, log in using your identity provider credentials.
Single sign-on is successfully set up if the Users landing page appears in KACE Cloud:
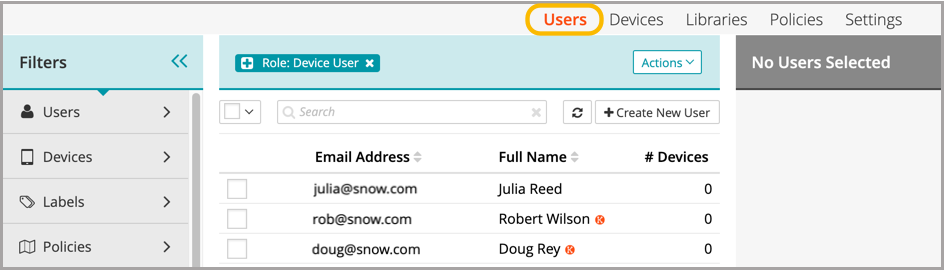
When the setup of single sign-on is successfully tested, users can be redirected to the identity provider's login screen.
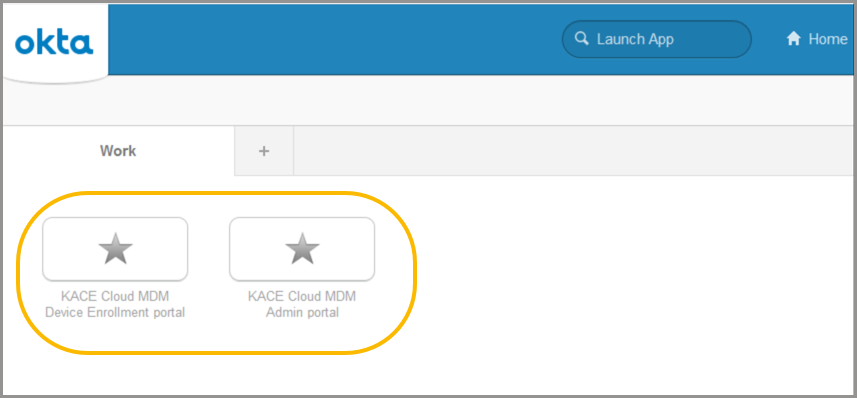
- In your Okta portal, locate the KACE Cloud bookmarks.
Users can now use the two bookmark apps in the Okta application library to access the KACE Cloud Admin portal and KACE Cloud Device Enrollment portal.
Troubleshooting
| Problem | Solution |
|---|---|
| Single Sign-On button not visible on KACE Cloud portal. | Confirm that Enable single sign-on is checked on the SSO Settings page. |
| Error message on KACE Cloud portal. |
The identity provider successfully validated the username and password, but KACE Cloud did not accept the user. This may be because the user is not in the Azure AD group being assigned a device admin role. To troubleshoot:
|
| Single Sign-On misconfiguration or identity provider error |
As part of SSO, most companies will redirect their users to their identity provider's sign-in page. In the case of a misconfiguration or identity provider error, a device admin can bypass SSO by adding ?nosso=1 to the end of their product portal URL to turn off redirection and go directly to the KACE Cloud login screen. Example: https://yourcompany.kacecloud.com?nosso=1 |
| An "invalidFederatedIdentityActionMessage" error message is displayed on KACE Cloud portal. | The identity provider used a certificate to sign the SAML request/responses which does not match one of the certificates listed in the "Validating certificates" field of the KACE Cloud single sign-on configuration. Ensure that the list of Validating Certificates matches the list of certificates currently being used by your identity provider. Enable the Refresh SAML validating certificates every day using the federation metadata document field to have KACE Cloud automatically keep the Validating Certificates field up to date by attempting to retrieve the most current signing certificate information from the URL provided in the Federation metadata document URL field each day. |