Schedule policies
You can add schedules to a policy to activate it at specified times. This is useful for policies that you want to enable periodically.
By default, all policies are enabled at all times. Each policy must have at least one active period per week.
Some actions (primarily Android app installations) are completed outside of the control of KACE Cloud. These are only initiated during the available schedule window, however if the device is unavailable when the associated policy initiates the action, the action is completed outside the related schedule. This type of action is different than those associated with other entities, such as iOS or Windows apps, Wi-Fi, or VPN configurations.
Communication with associated devices only occurs during the policy's active periods in the time zone reported by each device. You can override the time zone for selected devices. For details, see Override device-specific time zone.
If a device is associated with multiple scheduled policies referencing the same Library entity, the highest priority policy is applied. Those entities that can have multiple items deployed to devices (such as certificates or Wi-Fi configurations), KACE Cloud applies the highest-priority policy’s schedule for each individual item that is being deployed, regardless of whether it is linked to the device from multiple policies. For Library entities that only support a single deployment to a device (such as option sets or apps with specific app configurations), only the item from the highest-priority policy is deployed using that policy's schedule. For more information on how KACE Cloud determines the order at which policies are applied, and for the full list of entities that can be applied only once to a device, see Reorder policies.
To schedule a policy:
- Go to Policies in top navigation to open the Policies page.
- Click an individual policy to open it.
Or
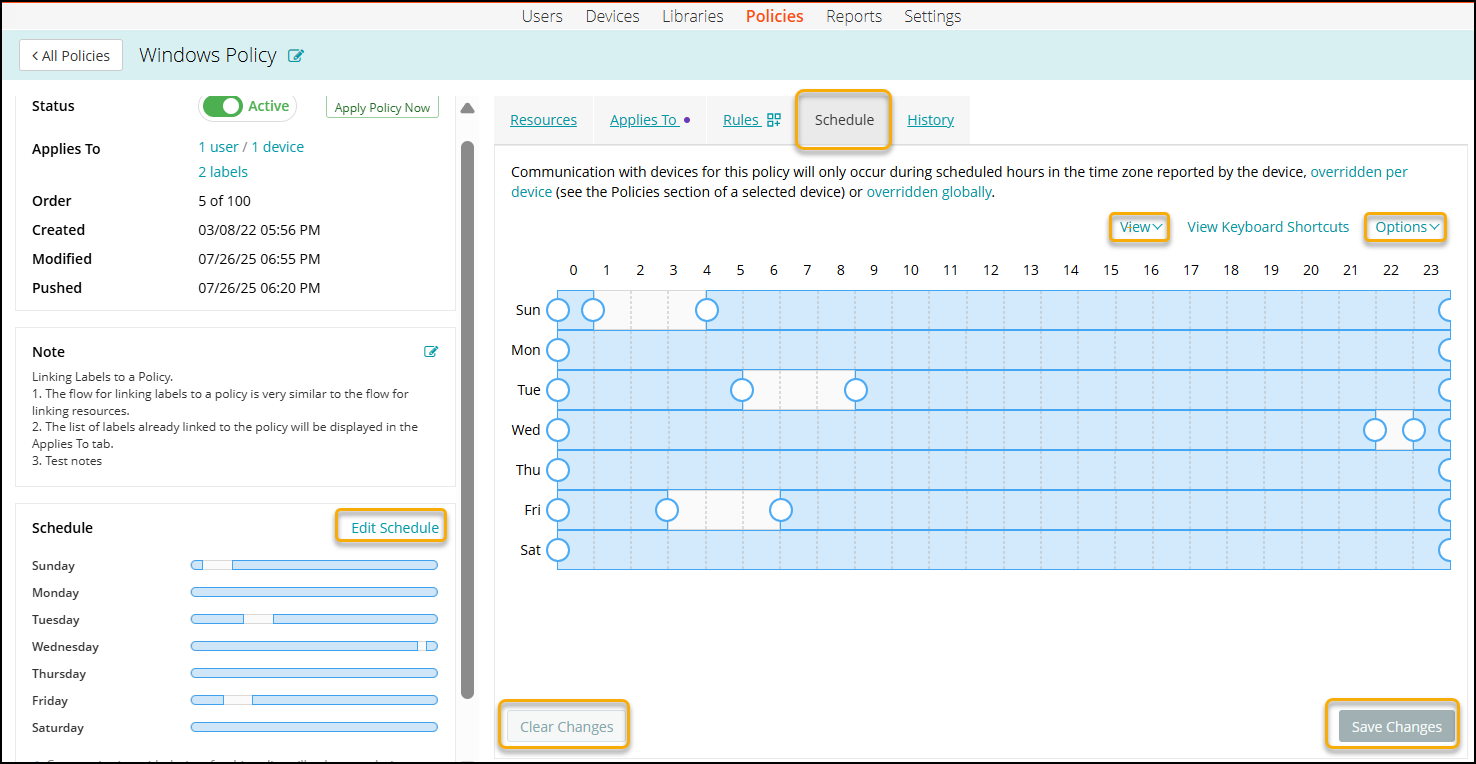
Click Add New to create a new policy. - In the left panel, in the Schedule section, click Edit Schedule. Alternatively, in the main area, click the Schedule tab to display the schedule.
- On large and medium screens, the Calendar view appears.
- Smaller screens such as mobile phones display the Form view.
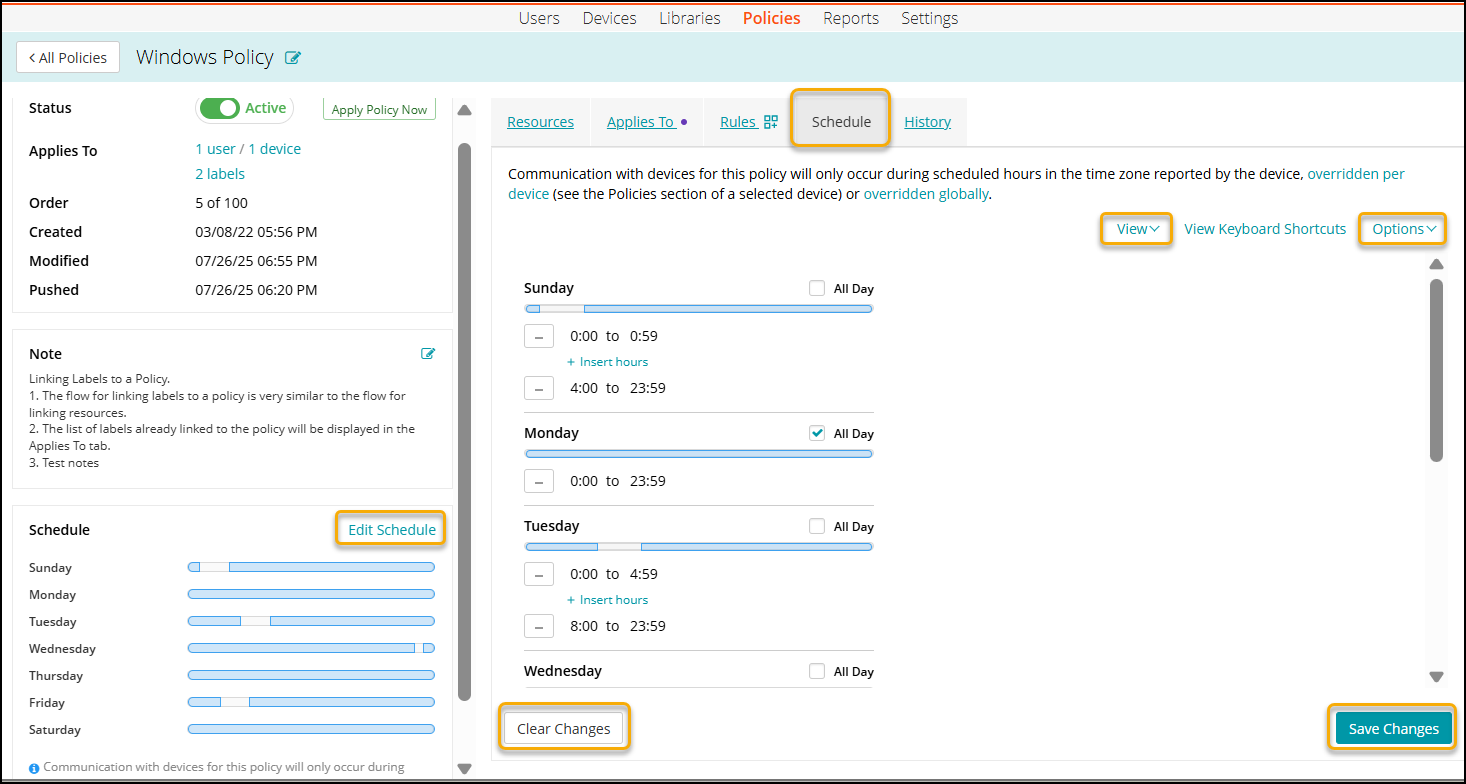
- To switch between the views, click View, and choose Calendar or Form, as required.
- On large and medium screens, the Calendar view appears.
- Edit the policy schedule, as required.
The schedule displays a combination of blue and gray sections.
Blue sections in the view indicate the time during which the policy is active.
Grey sections show inactive periods.- Calendar view only. Drag the handles or click the fields in the calendar to specify the active periods in the schedule.
- Form view only. Specify active periods for each day of the schedule:
- To have the schedule active during the entire day, select All Day.
- To enable one or more periods of the day during which the schedule is active:
- For each period, click Insert hours, and specify the time range. Then click Add hours.
- Optional.
- To enable the schedule at all times, click Options, and choose Reset to default.
- To disable the schedule completely, click Options, and choose Clear schedule.
This is useful if you want to start from scratch.
- Click Save.